
Enable smooth integration with Microsoft login using the following step-by-step guide to obtain your App ID and App Secret:
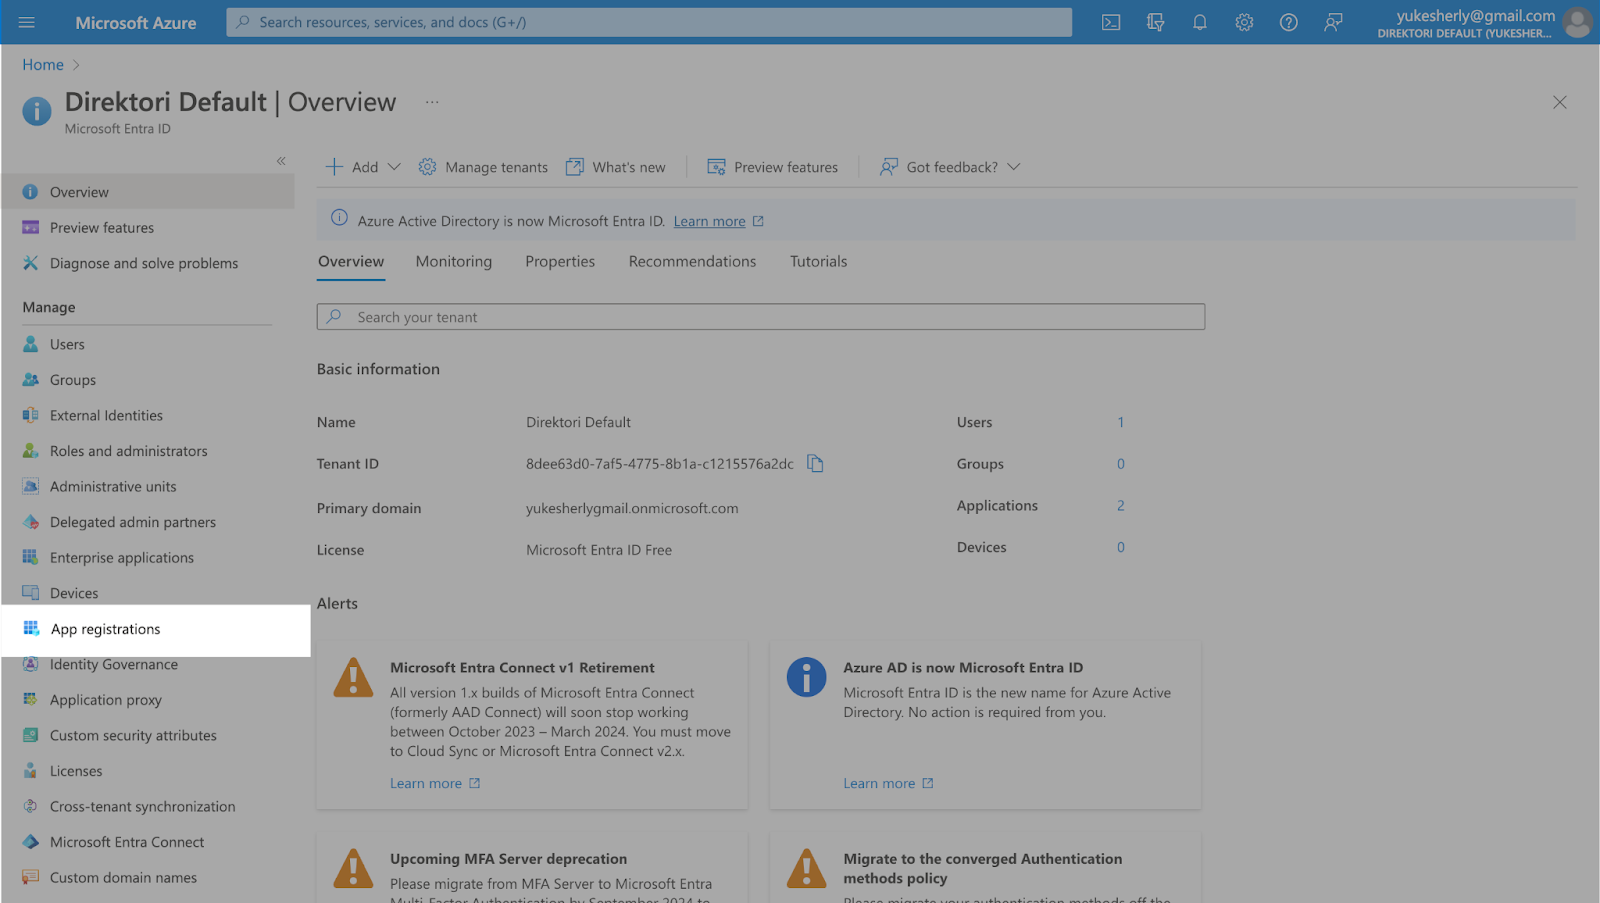
Step 1: Access Microsoft Azure Account
- Visit Microsoft Azure Portal.
- Log in with your Microsoft account, or register if needed.

- Under "Manage Microsoft Entra ID," click “View”.

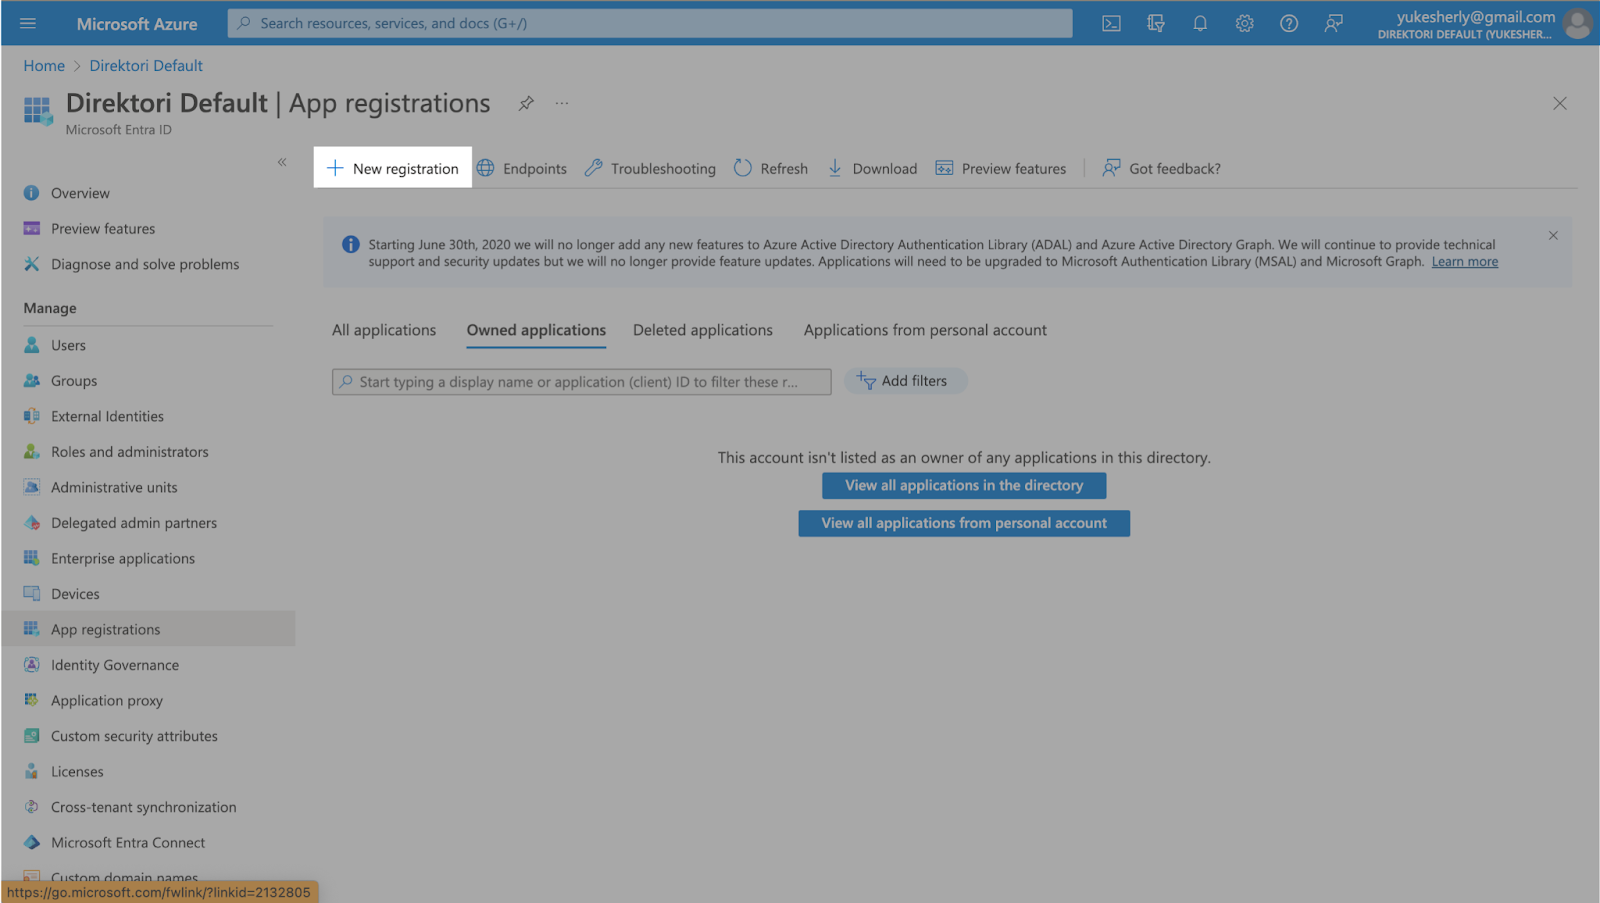
Step 2: Register Your Application
- Select the “App Registrations” menu.
- Click "+ New registration."
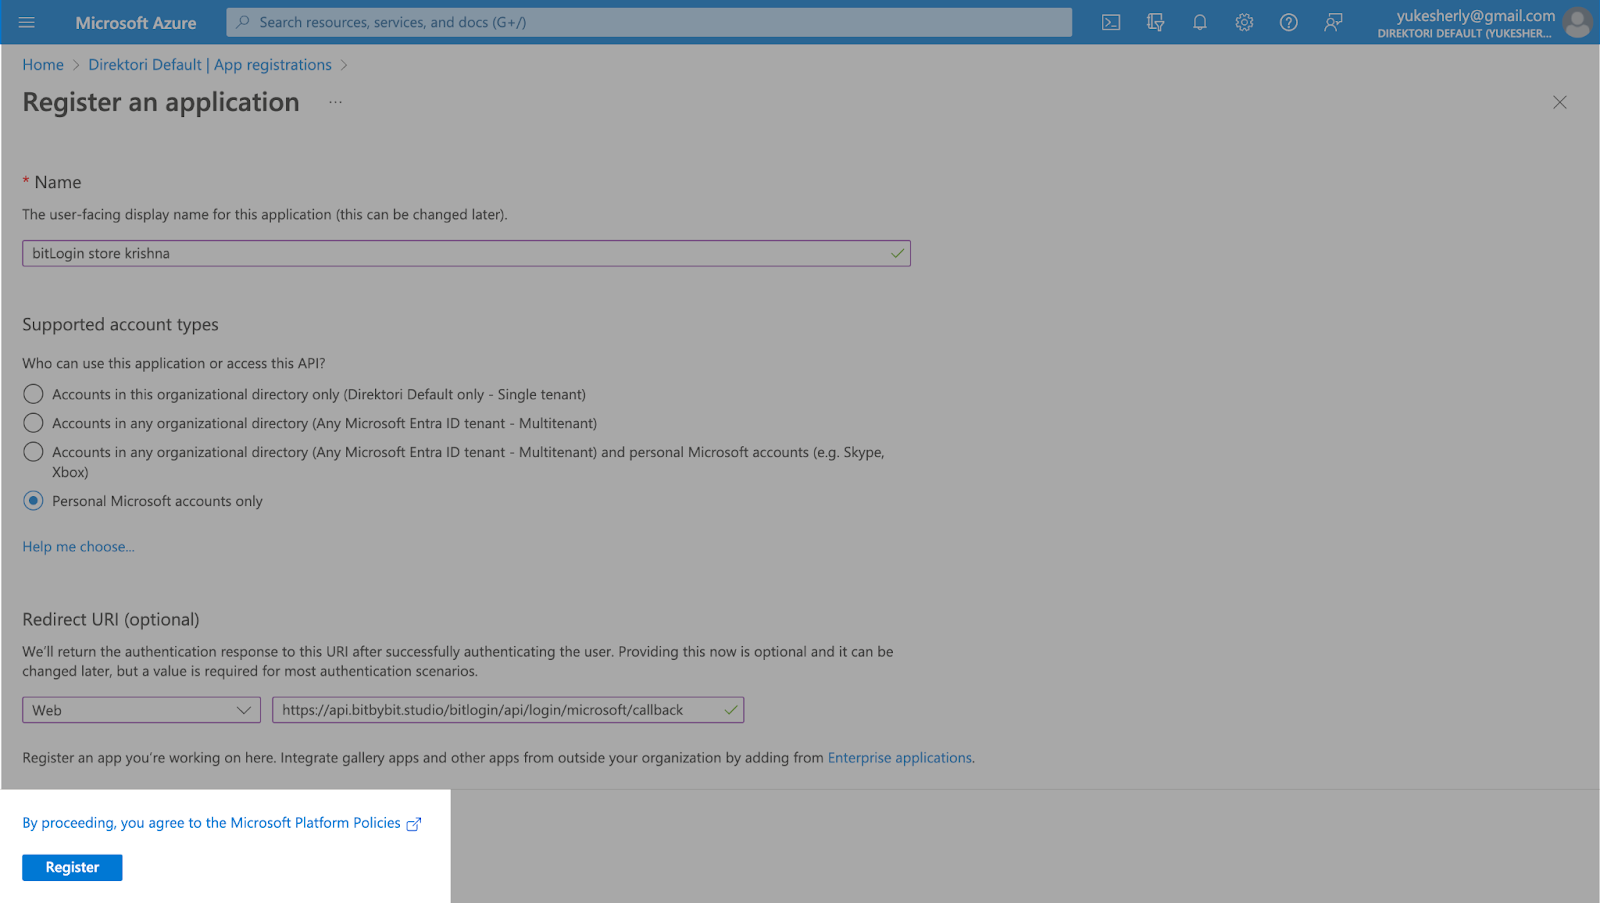
- Enter your store name under “Name”, select “Microsoft accounts only”, and for “Redirect URI”, choose “web” and use: https://api.bitbybit.studio/bitlogin/api/login/microsoft/callback
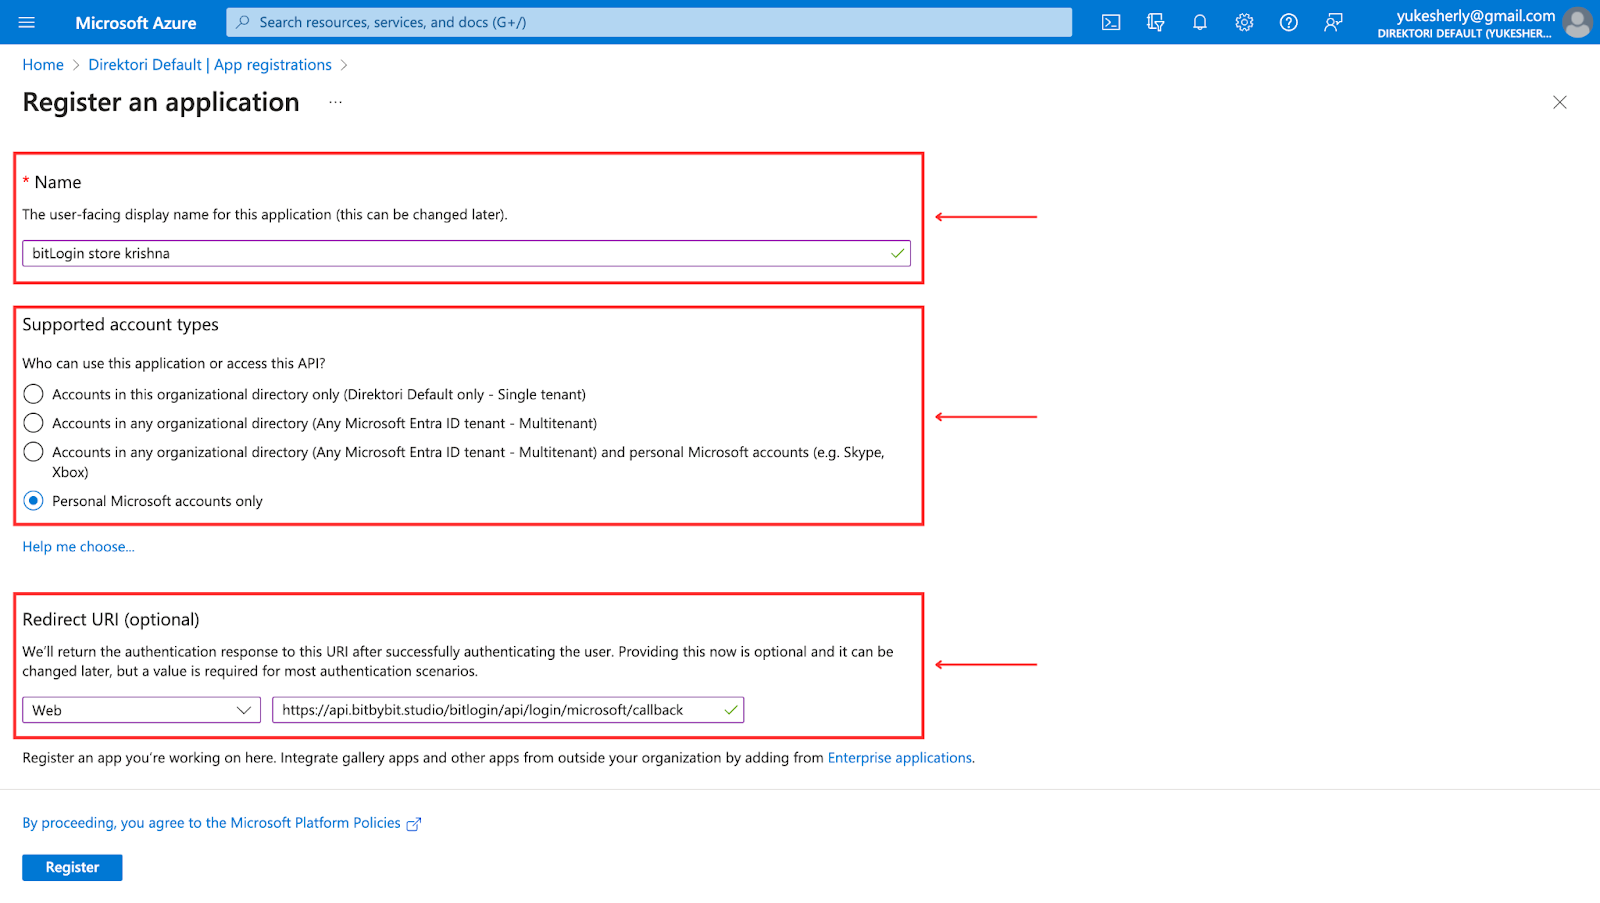
- Click “Register” to continue.
Step 3: Obtain App ID & App Secret
- Upon registration, find your App ID below the display name.
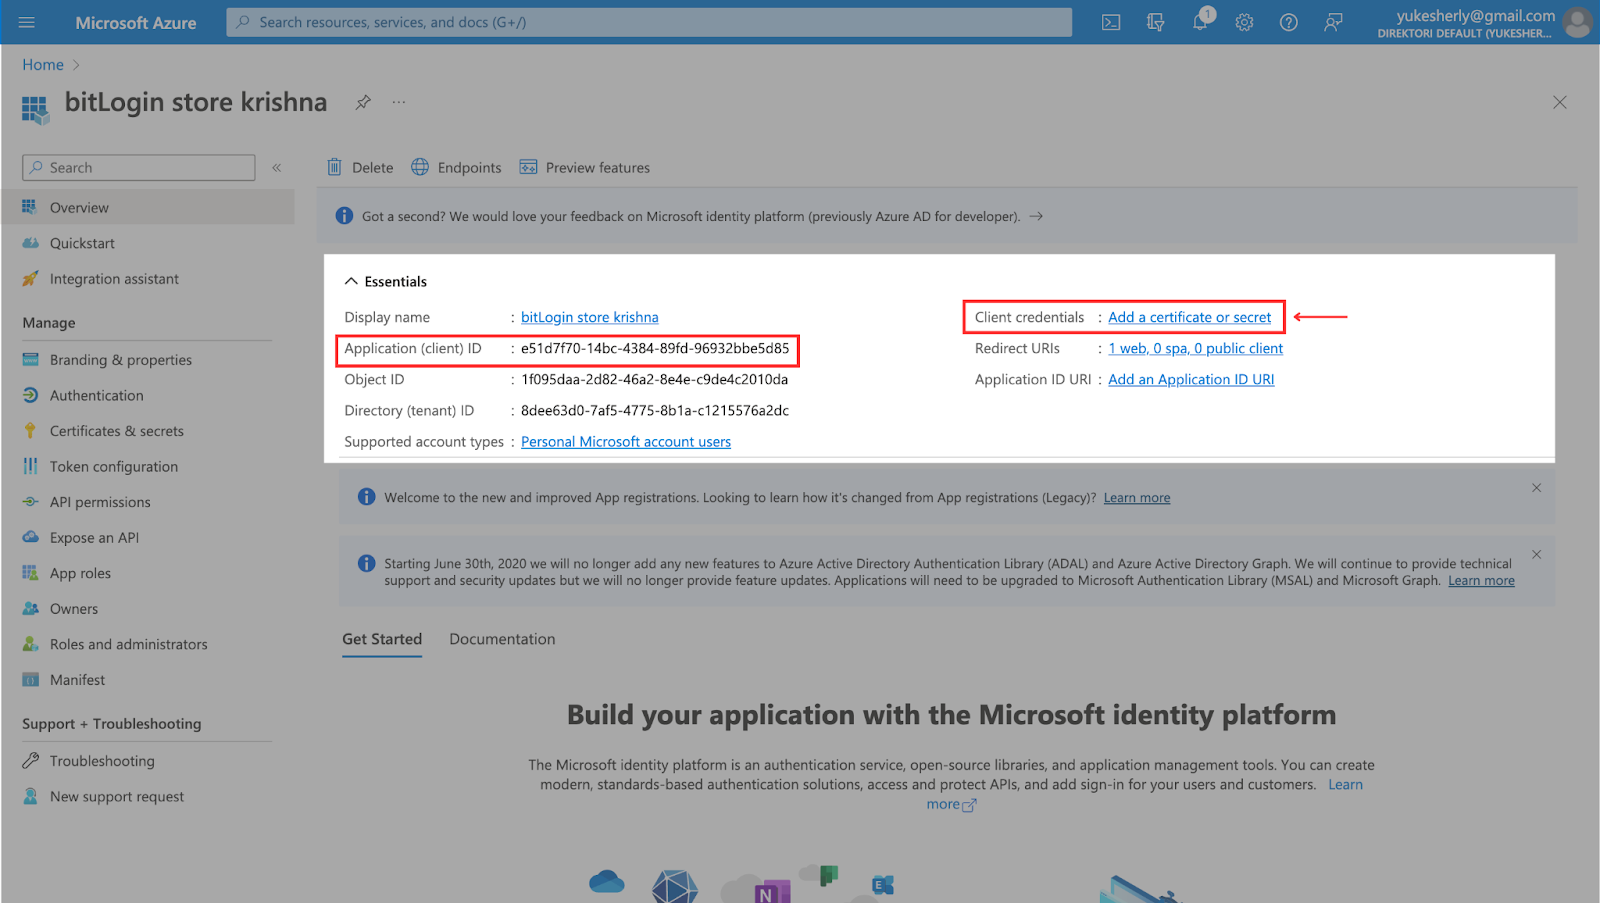
- Click “Add a certificate or secret” to set up the App Secret.
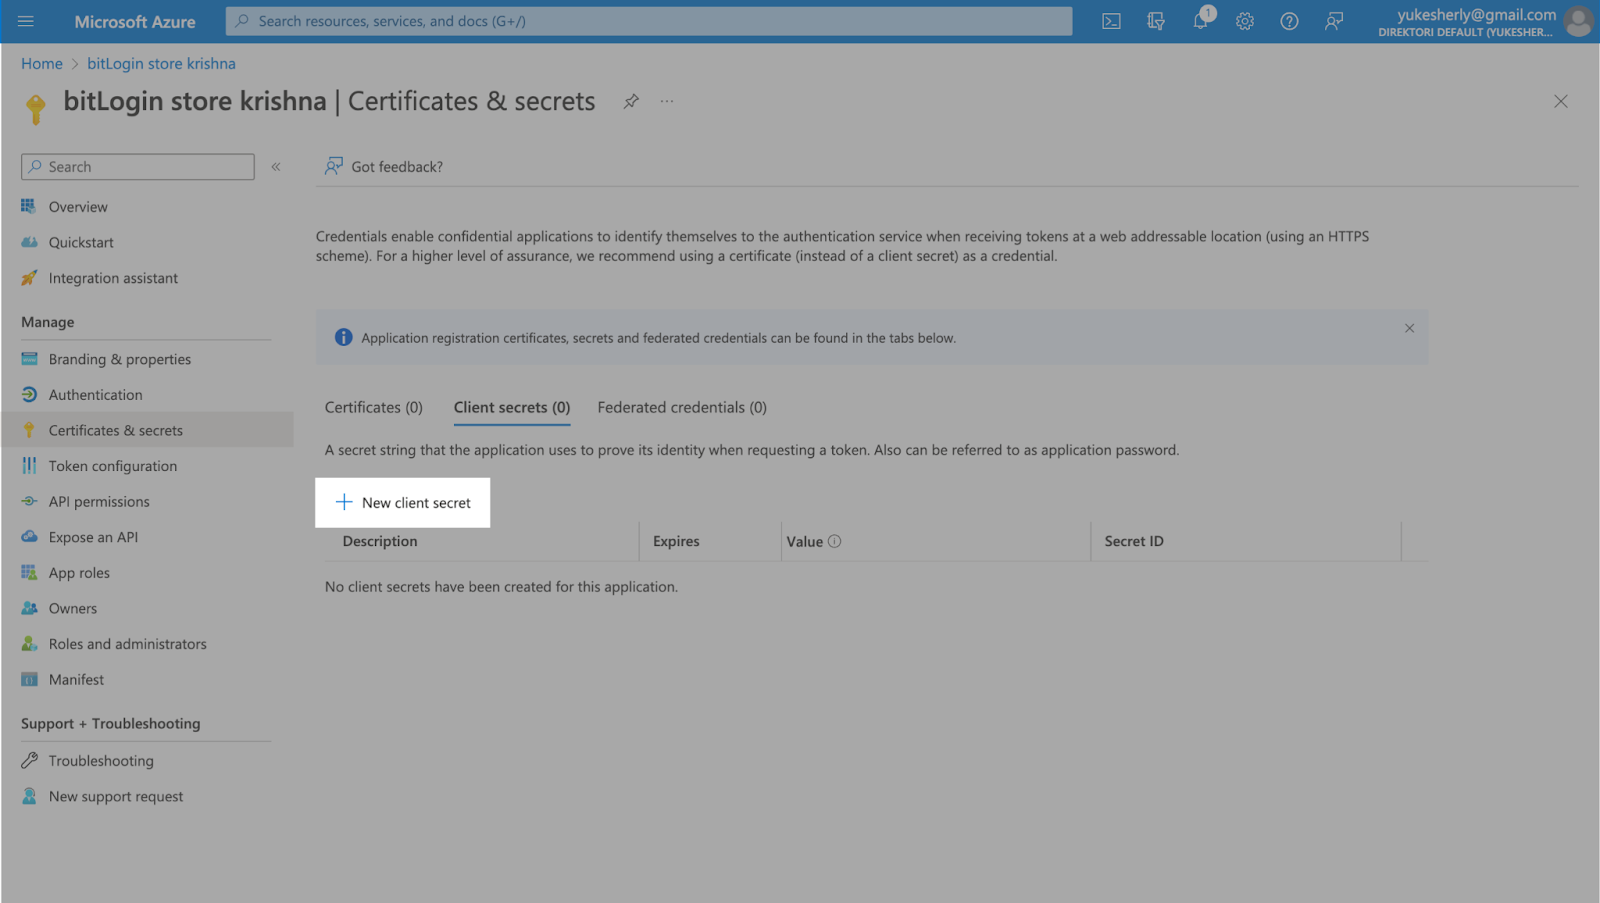
- In “Certificates and secrets”, click "+ New client secret", provide a description and set expiration to 365 days (recommended).

- Click 'Add.' Copy the App Secret from the “Value” column. Then copy-paste it for convenience.


Step 4: Configure Microsoft OAuth
- Copy the App ID and App Secret. Paste them into the Microsoft Settings on the bitLogin page.

- Click “Save Changes”.
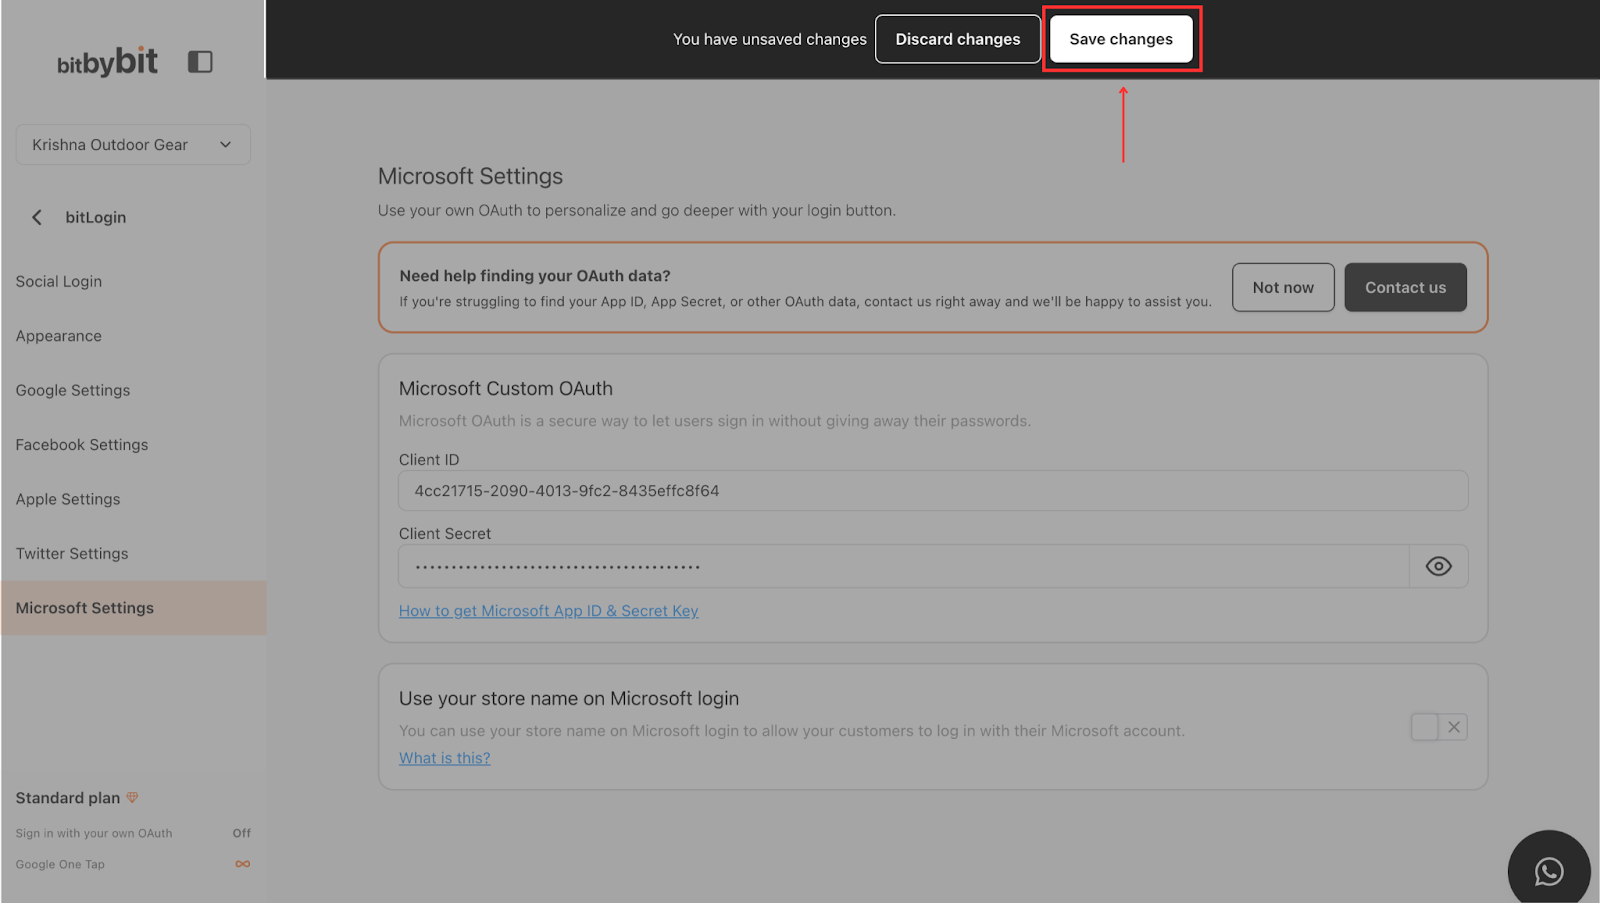
- Activate the "Use your store name on Microsoft login" switch until it turns green.

Step 5: Completion
You’ve successfully obtained the Microsoft App ID and App Secret. Securely store your App Secret, as it’s crucial for secure authentication.